OpenCV
This guide systematically introduces how to integrate and use [OpenCV]( https://opencv.org/ ) ([Open Source Computer Vision Library]( https://opencv.org/ )) on the Android platform for computer vision application development. It aims to provide developers with a clear practical path to help you quickly and smoothly deploy and apply the powerful vision features of OpenCV in your Android projects.
Introduction
Android OpenCV is a ported version of OpenCV specifically for the Android platform, designed to support computer vision (CV) and machine learning (ML) development on mobile devices. It supports multiple programming language interfaces including Java, C++, and Python. On the Android platform, OpenCV provides rich image processing and computer vision features, enabling developers to easily implement complex tasks such as face detection, object recognition, image tracking, and liveness detection.
Core Features
Cross-platform: OpenCV supports Windows, Linux, macOS, iOS, and Android.
Comprehensive functionality: Covers everything from basic image processing to advanced machine learning and deep learning algorithms.
High performance: The underlying implementation is in efficient C/C++, and Java interfaces are provided for Android via JNI (Java Native Interface) technology, ensuring execution efficiency on mobile devices.
Main application areas include smart security, medical image processing, industrial quality inspection, autonomous driving, as well as mobile identity authentication and smart interaction.
Prerequisites
Before integrating OpenCV, please ensure your development environment meets the following requirements.
System and Environment Requirements
Operating System: Windows, macOS, or Linux.
Development Tool: Android Studio (latest stable version recommended). Early OpenCV samples might be based on Eclipse, but current development primarily uses Android Studio.
Android SDK and NDK: Download and configure in Android Studio. Some advanced features (such as native C++ development) require the NDK.
Java Development Kit (JDK): Android Studio usually includes or automatically configures it.
Obtaining the OpenCV Library
You need to download the Android SDK package from the official OpenCV website.
Visit the OpenCV official releases page.
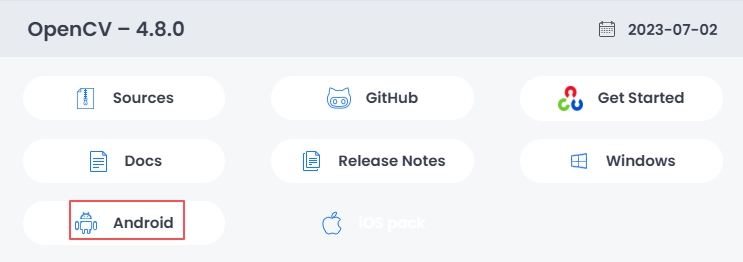
Select the latest or a specific version of OpenCV, download the “Android” archive and extract it locally. Here we use 4.8.0 as an example:
Main SDK directory structure description:
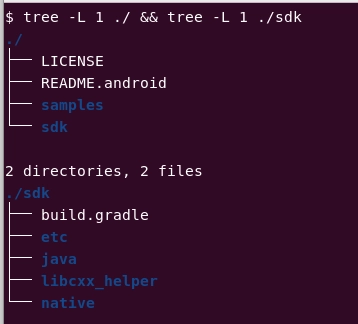
[电子表格]
Installation Steps
Below are two mainstream methods for integrating OpenCV into an Android Studio project.
Importing the Local SDK Module (Traditional Method)
This method directly integrates the OpenCV library source code and native libraries into your project.
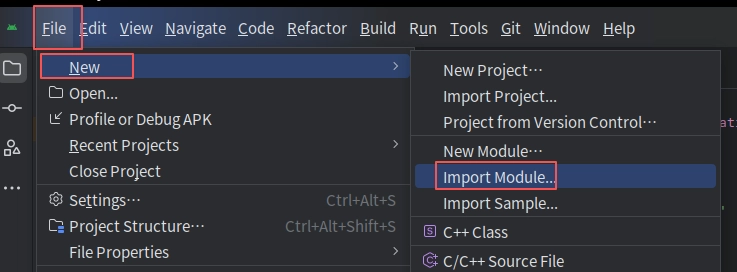
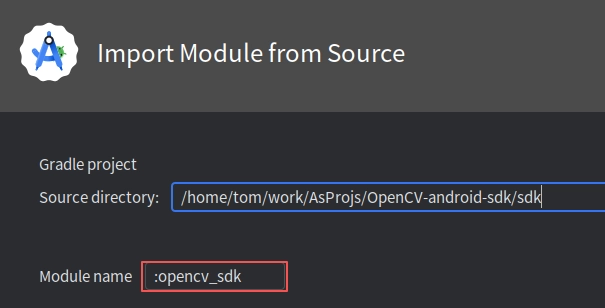
Import Module: In Android Studio, select File -> New -> Import Module…, browse and select the sdk directory from the extracted OpenCV SDK. Here, specify the Module Name as opencv_sdk.
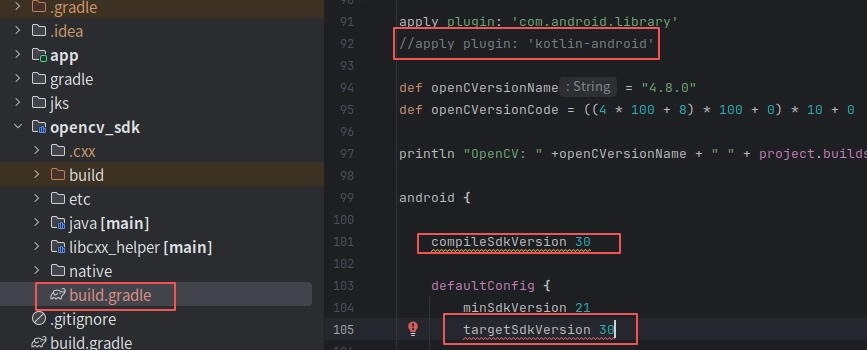
Modify the opencv_sdk build.gradle file:
Modify the sdk versions in the build.gradle file to match the sdk versions in the app’s build.gradle.
Comment out the ‘kotlin-android’ plugin.
Recompile successfully.
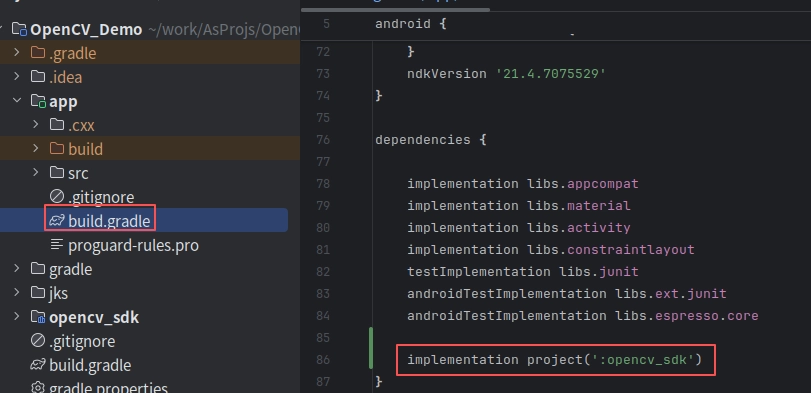
Add Module Dependency: Open your App module’s build.gradle file, and add the dependency on the OpenCV module in the dependencies block: implementation project(‘:opencv_sdk’).
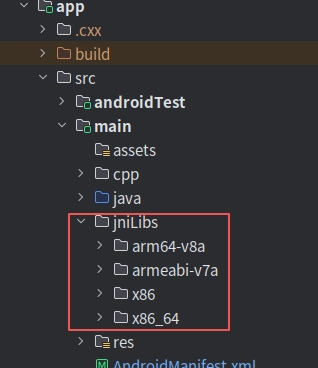
Copy Native Libraries: Create a jniLibs folder under the main directory of your App module (if it doesn’t exist). Copy all subdirectories (such as arm64-v8a) from OpenCV-android-sdk/sdk/native/libs into the jniLibs directory.
Sync Configuration: Ensure that the compileSdkVersion, minSdkVersion, and other version numbers in the imported OpenCV module’s build.gradle file are consistent with your App module.
Via Maven Dependency (Recommended, Simple)
Starting from OpenCV 4.5.1, official Maven repository support is available, which is the most convenient integration method.
Add Dependency: In the dependencies block of your app module’s build.gradle file, add:
// Replace 4.x.x with the latest version number or a specified version number
implementation 'org.opencv:opencv-android:4.x.x'
Sync Project: Gradle will automatically download the corresponding OpenCV Java library and native libraries from the Maven repository.
Feature Usage
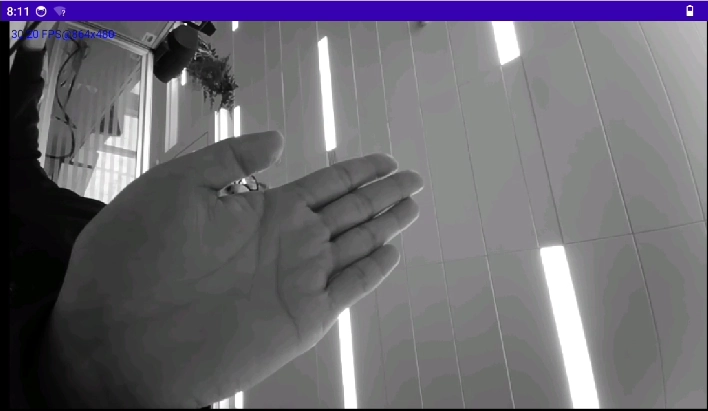
Below, we will use the real-time camera stream grayscale conversion feature as an example to introduce the usage.
Adding Permissions
Add permissions in the AndroidManifest.xml file of the app module:
<uses-permission android:name="android.permission.CAMERA" /><uses-featureandroid:name="android.hardware.camera"android:required="true" /><uses-featureandroid:name="android.hardware.camera.autofocus"android:required="false" /><uses-permission android:name="android.permission.WRITE_EXTERNAL_STORAGE" />
Create a new DemoActivity, and implement the real-time camera stream grayscale conversion feature:
activity_demo.xml:
<?xml version="1.0" encoding="utf-8"?><androidx.constraintlayout.widget.ConstraintLayout xmlns:android="http://schemas.android.com/apk/res/android"xmlns:app="http://schemas.android.com/apk/res-auto"xmlns:tools="http://schemas.android.com/tools"android:id="@+id/main"android:layout_width="match_parent"android:layout_height="match_parent"tools:context=".DemoActivity"><org.opencv.android.JavaCameraViewandroid:id="@+id/javaCameraView"android:layout_width="match_parent"android:layout_height="match_parent"app:camera_id="back"app:show_fps="true" /></androidx.constraintlayout.widget.ConstraintLayout>
DemoActivity.java:
public class DemoActivity extends CameraActivity implements CameraBridgeViewBase.CvCameraViewListener2 {private static final String TAG = "opencvDemo";private JavaCameraView javaCameraView;@Overrideprotected void onCreate(Bundle savedInstanceState) {super.onCreate(savedInstanceState);setContentView(R.layout.activity_demo);ViewCompat.setOnApplyWindowInsetsListener(findViewById(R.id.main), (v, insets) -> {Insets systemBars = insets.getInsets(WindowInsetsCompat.Type.systemBars());
            v.setPadding(systemBars.left, systemBars.top, systemBars.right, systemBars.bottom);return insets;});

        javaCameraView = findViewById(R.id.javaCameraView);
        javaCameraView.setVisibility(SurfaceView.VISIBLE);
        javaCameraView.setCvCameraViewListener(this);}@Overridepublic void onPause() {super.onPause();if (javaCameraView != null) {
            javaCameraView.disableView();}}@Overridepublic void onResume() {super.onResume();if (!OpenCVLoader.initDebug()) {OpenCVLoader.initAsync(OpenCVLoader.OPENCV_VERSION, this, baseLoaderCallback);} else {
            baseLoaderCallback.onManagerConnected(LoaderCallbackInterface.SUCCESS);}}private final BaseLoaderCallback baseLoaderCallback = new BaseLoaderCallback(this) {@Overridepublic void onManagerConnected(int status) {switch (status) {case LoaderCallbackInterface.SUCCESS: {
                    javaCameraView.enableView();}break;default:super.onManagerConnected(status);break;}}};@Overrideprotected List<? extends CameraBridgeViewBase> getCameraViewList() {List<CameraBridgeViewBase> list = new ArrayList<>();
        list.add(javaCameraView);return list;}@Overridepublic void onCameraViewStarted(int width, int height) {}@Overridepublic void onCameraViewStopped() {}@Overridepublic Mat onCameraFrame(CameraBridgeViewBase.CvCameraViewFrame inputFrame) {return inputFrame.gray();}}
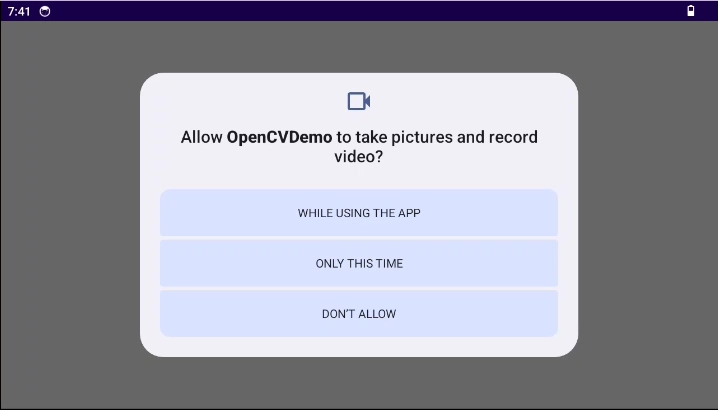
In MainActivity, after granting permissions, it will automatically jump to DemoActivity:
FAQ
[电子表格]
Advanced Suggestions
Start with samples: The samples directory included with the OpenCV Android SDK is an excellent learning resource, covering various scenarios from basic camera operations to face detection and color tracking.
Mix Java and C++: For core algorithms with high performance requirements, you can call C++ code via JNI. OpenCV provides complete native/jni support.
Focus on the DNN module: The DNN module of OpenCV allows efficient execution of deep learning models (such as YOLO, MobileNet SSD) on mobile devices, which is key to implementing modern computer vision applications (such as object recognition and liveness detection).